
Installing the BSC Integration bridge

Aug 20, 2025
 1232
1232
Installing the Integration Bridge
How to install SPR Integration files in any location:
These instructions are applicable for both local and network installations
- Click this URL to download the bridge - https://www.bostonsoftware.com/Downloads/SinglePoint/SPRIntegrationSetup.exe
- Once the file is downloaded, look for it in either the top right, or bottom left of the screen (depending on the browser you use) and open it.

**Note: If the workstation's security settings do not allow you to run/download the .exe, you may need to involve the agency's IT admin.
- SinglePoint Integration InstallAware Wizard will now load. If you haven't elevated to run as a service, you may not be able to give Windows permission to run, in which case, you will have to involve your IT people.

Click "Next".
-
The next screen will default to a location where it found a prior instance of Webupld.exe.
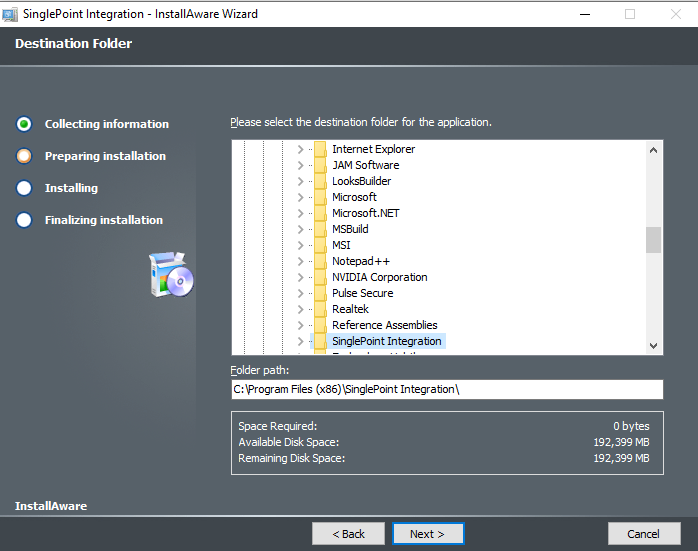
-
Click next to install the bridge to it's default location "C:\Program Files (x86)\SinglePoint Integration".
Caution: SOME environments will not allow you to put a mapped drive path here, even though you can navigate there in Windows. In such cases you may have to figure out what the long path is.
- Click "Next" until installation is done and "Finish" to close. It may take longer than expected depending on the machine. Let it do its thing and be patient.
- When everything is done, these files will be installed:

- If the management system has already been configured, you may now test exporting into SinglePoint.
If the agent wants to export from SinglePoint back to the management system, you will need to run SPRWKsetup.exe from the above folder. Simply hit "Next" until the installer finishes. This will teach the workstation how to handle ".bscx" files for exporting from SPR.
- You have successfully installed the "Integration Bridge"

